Foam rolling is one of those activities that every runner hears they should be doing. We know it’s important, but we aren’t exactly sure why, how to do it, or when to do it. When done correctly, it’s a highly effective tool for recovery and will increase performance.
What the Heck is Foam Rolling, Anyway?
Foam rolling is a self-myofascial technique that breaks up adhesions and scar tissue that accumulates within our muscles during exercise and daily activities. Steph Creaturo, co-owner of Mala Yoga in Brooklyn, NY, teaches a yoga class specifically for runners that incorporates rolling with foam rollers, golf balls, and tennis balls. She equates a foam roller to a Zamboni machine for your muscles. Foam rolling helps to smooth out the rough patches, promoting better blood flow to the muscle, which reduces soreness and increases performance.
In a study published by Medicine & Science in Sports & Exercise, researchers found that foam rolling the legs after a squat workout helped speed recovery. The subjects who foam rolled were less sore overall, muscle soreness peaked earlier, and they performed better in vertical leap, range of motion, and muscle contraction tests. Adding foam rolling into your daily routine will help make you a more nimble runner.
How Do I Get My Foam Roll On?
Foam rolling can be done pre- and post-workout. Spend 30 seconds to 1 minute on each movement. Remember to breathe and take it slow. When you hit a particularly tight area, stay there for an extra breath and allow the muscle to sink into the roller. This is the key part to self-myofascial release. Applying pressure to a tight spot or a knot sends a signal to the muscle telling it to relax. Give your body and muscles time to make that connection.
Remember the Zamboni example: it moves slowly and purposefully over the ice to create a smooth surface. On recovery days, spend more time (2-3 minutes) on each movement and add in multi-dimensional movements (side-to-side, flexion and extension).
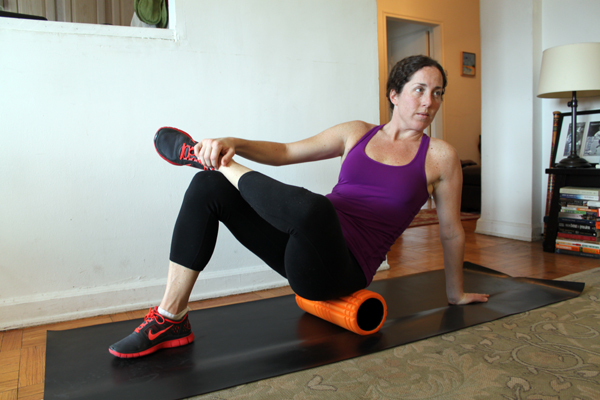
Piriformis
Your piriformis is a narrow muscle that lies underneath the larger glutes in your butt. This muscle helps you run and rotate your hip. Start by sitting on top of the foam roller with the roll positioned on the back of the hip. Cross one foot to the opposite knee and lean into the hip of the crossed leg. Slowly roll on the posterior hip area to find the tender spot. Hold the spot for a few deep breaths.
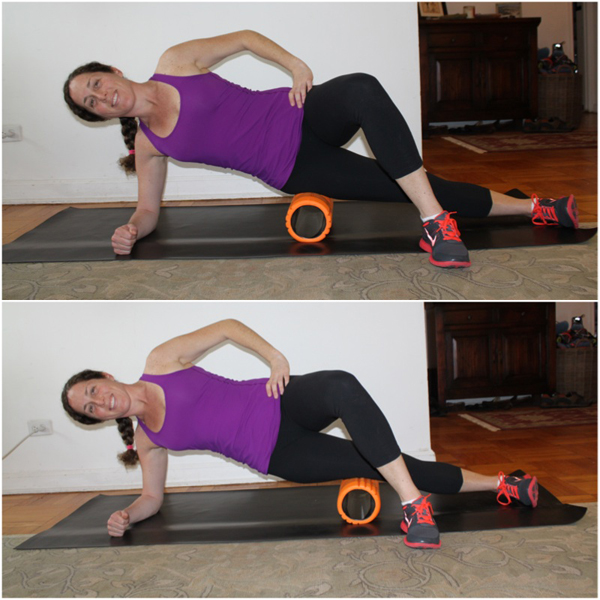
IT Band
Lie on your side with the foam roller perpendicular to your body and below your hip. Bring the top leg in front of you and use it as leverage. Place your hands on the other side of the foam roller. Slowly begin to roll the foam roller down your leg, stopping just above the kneecap. As the roller moves down your leg, stop every 1-2 inches and rock your hips forward and backwards over the foam roller to release tension. Be gentle and breathe.

Quadriceps
Start in a forearm plank position with the roller positioned at your hip, where the quads attach. Begin to slowly roll down your leg. Stop every 1-2 inches and move your leg left to right. Roll down another inch and repeat. Stop just below the kneecap (about 1 inch above). Rocking the body from left to right helps break up any knots that form while exercising. As a bonus, instead of moving side to side, bend your knee every 1-2 inches as you move down your quad (or when you hit a tight spot).
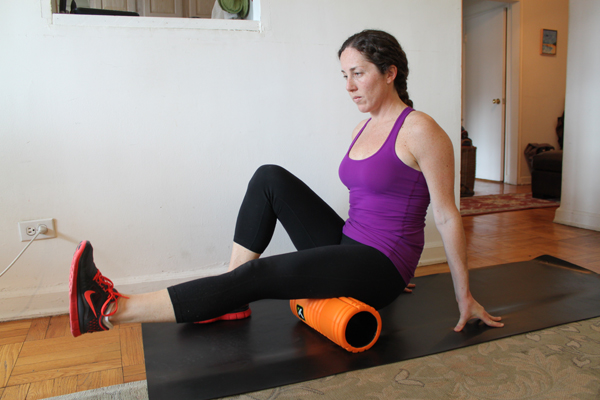
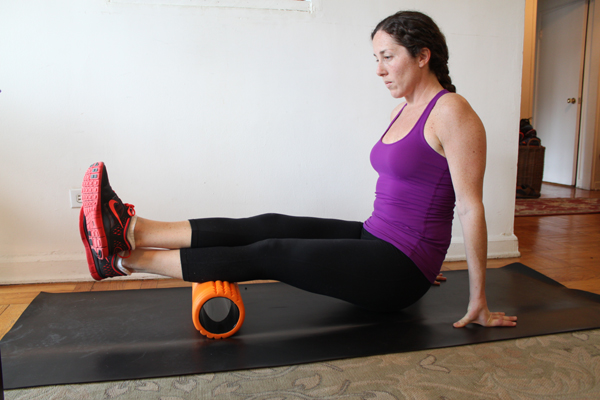
Hamstrings
Sit at one end of the roller with the other leg off the side supporting you. Start where your hamstrings attach to your gluteus maximus and slowly roll down your leg. Stop before you hit the back of your knee. When you get to a particular tight spot, stay an extra few breaths and try to sink into the foam roller a bit more.
Calves
These muscles (the soleus and the gastrocnemius) are the muscles that help you push off and move forward, which will make you faster, especially up hills! Start with the roller under your calf and closer to your knee. Either cross the other leg over the bottom leg (this provides more pressure on the calf you are foam rolling) or keep it off to the side. Slowly roll down to your ankle. Stop at any sore or tight areas and turn your foot left and right, which ensures that you hit all sides of the gastrocnemius. Point and flex your foot on any tight areas.
Also Read:
6 Rules for Running as a New Mom
Fire Up Your Glutes on the Treadmill with an Interval Incline Workout